Raising chickens might not sound like an exciting business on paper, but it definitely has its perks. While eating farm-fresh eggs ranks high on the list, the incubation process carries its own, longer-lasting rewards. In this guide, we’ll walk you through the 7 steps to candling chicken eggs.

Why Is Candling Important?
If you’re hatching your own chickens, it’s important to make sure that the eggs are developing at the proper rate. Fortunately, eggshells are delicate membranes that allow you to periodically check on the progress of the young chicks growing inside. This is done via candling—the act of shining a light into the egg to view its contents.
Experienced chicken farmers know that the incubation process doesn’t have a 100 percent success rate. Some eggs simply aren’t fertile at all, while others might stop developing midway through the process. If these non-viable eggs aren’t removed from the incubator, they might rot and even burst. In addition to creating a foul smell, this will unleash bacteria that could contaminate the remaining viable eggs.
Sometimes, you can tell when an egg has stopped developing just by looking at the shell. If darker, raised spots appear on the exterior, then the egg is no longer viable. At this point, you should use the candling process just to make sure before you discard the egg.
Despite the name, it’s not necessary to use an actual candle. Modern technology has provided us with other options for safely checking an egg’s contents. Here are a few options:
- Place a 60-watt lightbulb inside a standard-sized coffee can. Punch a hole in the top of the can (about one inch in diameter should do the trick). Hold the egg above the hole.
- Look for an egg candling device at a farming supply store. Some of these devices are battery-operated, while others are powered by electricity. Make sure there’s a power outlet located near your incubator before investing in an electric model.
- Check an online retailer for an Ovascope, a device that places the egg under a hood atop a rotating stand. The egg is then viewed through a magnifying eyepiece. While this is a very cool option, be forewarned that it also carries a high price tag.
7 Steps To Candling Chicken Eggs
Here’s a step-by-step guide on how to successfully candle your clutch of eggs.
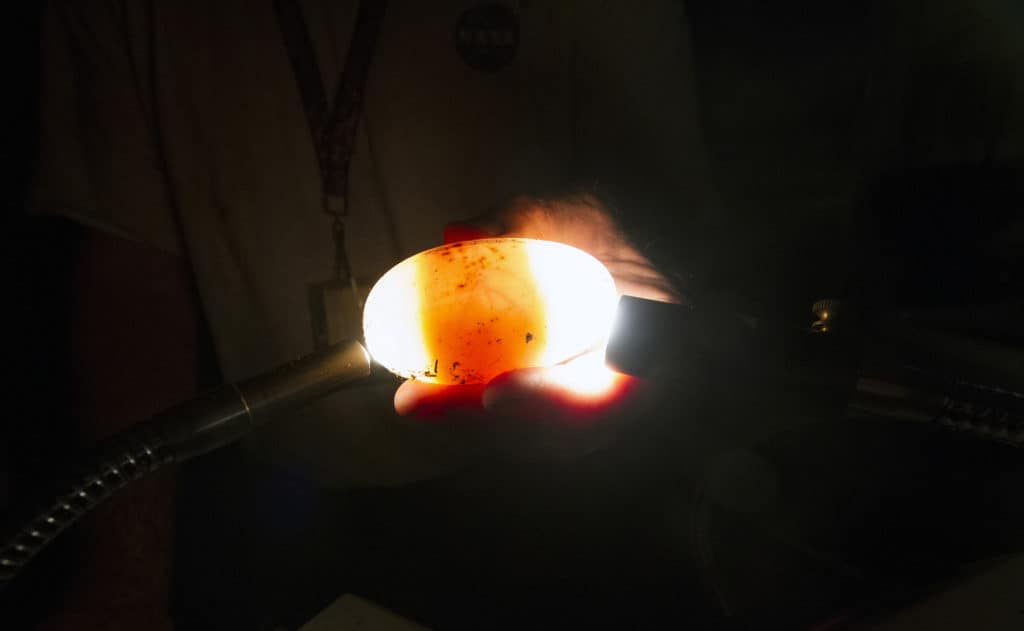
- Use your chosen method to hold the egg up against the light. Since the air sac develops on the larger, rounder portion of the egg, it’s preferable to place the light against this side.
- If necessary, rotate the egg or light source until you get the clearest possible view.
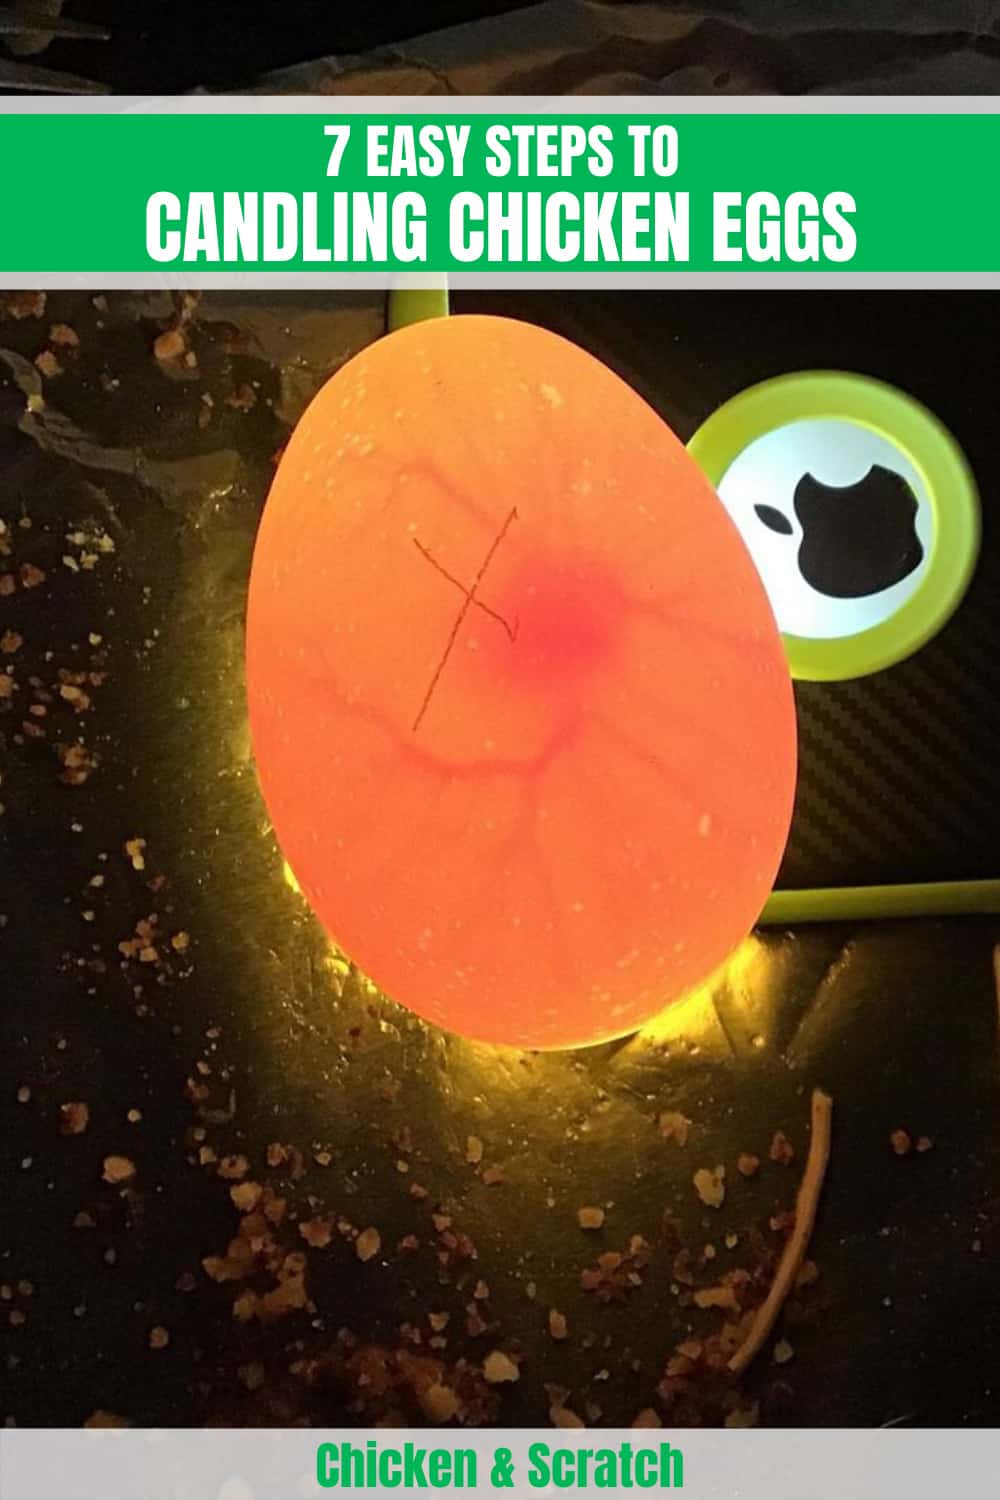
- Look for a network of white blood vessels with a dark outline at the center. This dark spot is the embryo. Depending on the egg’s development, you might be able to see the embryo moving, or even make out a set of eyes. If so, you have a “winner” on your hands—i.e., an egg that’s developing properly.
- If there’s a red circle on the inside of the shell, the egg is a “quitter.” That means the embryo began to develop but died at some point thereafter. The red ring is the mark of blood vessels that pulled away from the embryo after it ceased to be viable.
- Another hallmark of a quitter is a dark red streak along the inside of the egg. You shouldn’t go by this alone, however, because some healthy embryos might have this streaking too. For this reason, it’s best to use the blood ring as your guide.
- An egg that was never fertilized is known as a “yolker.” For obvious reasons, these eggs have no chance of developing into embryos and should therefore be discarded. Fortunately, it’s easy to identify a yolker. The egg will give off a sheer glow—no dark spots, no blood vessels, no streaking.
- Discard any yolkers and quitters. If you’re 100 percent sure that the egg is not viable, you’ll want to remove it from the warm and humid incubator as soon as possible. If you’re not sure (for example, if there’s streaking but no blood ring), put the egg back and check it again in a few days.
Pro Tips on Candling
- Make sure the room is fully dark before you begin. This will make the egg’s contents easier to view.
- Always candle the eggs prior to placing them in the incubator. This will help you identify the “yolkers” later on since an unincubated egg and a yolker have virtually the same appearance.
- Mark the eggs with a regular pencil to help tell them apart. Using numbers is a quick and easy way to establish the difference between them. Whatever you do, don’t use a pen or a marker—the toxins can seep through the shells and harm the embryos.
- Try not to handle the eggs after 14 days have passed. At this point, you should be certain which eggs are viable and which are not.
- Establish a routine for handling. It’s best to repeat the process twice: Once after 6-8 days, and then again at the 14-day mark.
- Don’t be tempted to candle the eggs every day. If you have an egg that’s making questionable progress, you can check it a few days later. All of the others should be handled as little as possible. Otherwise, you might accidentally hinder their development.
- Try to keep eggs out of the incubator for no longer than 30 minutes at a time.
- Discard any eggs that are especially soiled or dirty.
Summary
Of course, there are more than just 7 steps to candling chicken eggs. The procedure is more complex than it appears—understandable, given that it involves the creation of life. By following the advice listed above, however, you’ll become a seasoned pro in no time.

Joseph Hudson has been raising chickens for over 15 years. In 2018, he completed the Agriculture & Natural Resources program at Mt. San Antonio College. He currently raises over 1400 chickens on his 7.5-hectare farm. He keeps sharing his experience on raising healthy and happy chickens on Chicken Scratch The Foundry.