Raising quail for meat and eggs is becoming increasingly popular. The following tips are specific to raising birds of the domesticated Coturnix quail variety, but most of the tips can be adapted to raising quail of other varieties.
Why Raise Quail?
Unlike chickens, which require a considerable amount of space to keep, two dozen quail can be kept in three stacked cages that together take up no more space than a closet; even apartment dwellers can manage to produce their own fresh food or set up a small business.
In addition, quail are far more prolific egg-layers than chickens and reach a butchering size in only a couple of months. A dozen laying quail will produce an equivalent of up to 10-12 chicken eggs every single day.
Tip 1: Start With Hatching Eggs
Although live chicks can be purchased, it is far more economical to hatch quail from viable fertilized eggs. Once you have set up a quail colony, you can produce your own fertilized eggs and hatch them out to raise more quail in the future. All you need is a few high-quality males in your colony.
However, it is an excellent idea to introduce a new batch of purchased fertilized eggs now and again to avoid inbreeding in your colony. Inbred quail tend to be very unhealthy. They have low hatch rates and high morbidity rates.
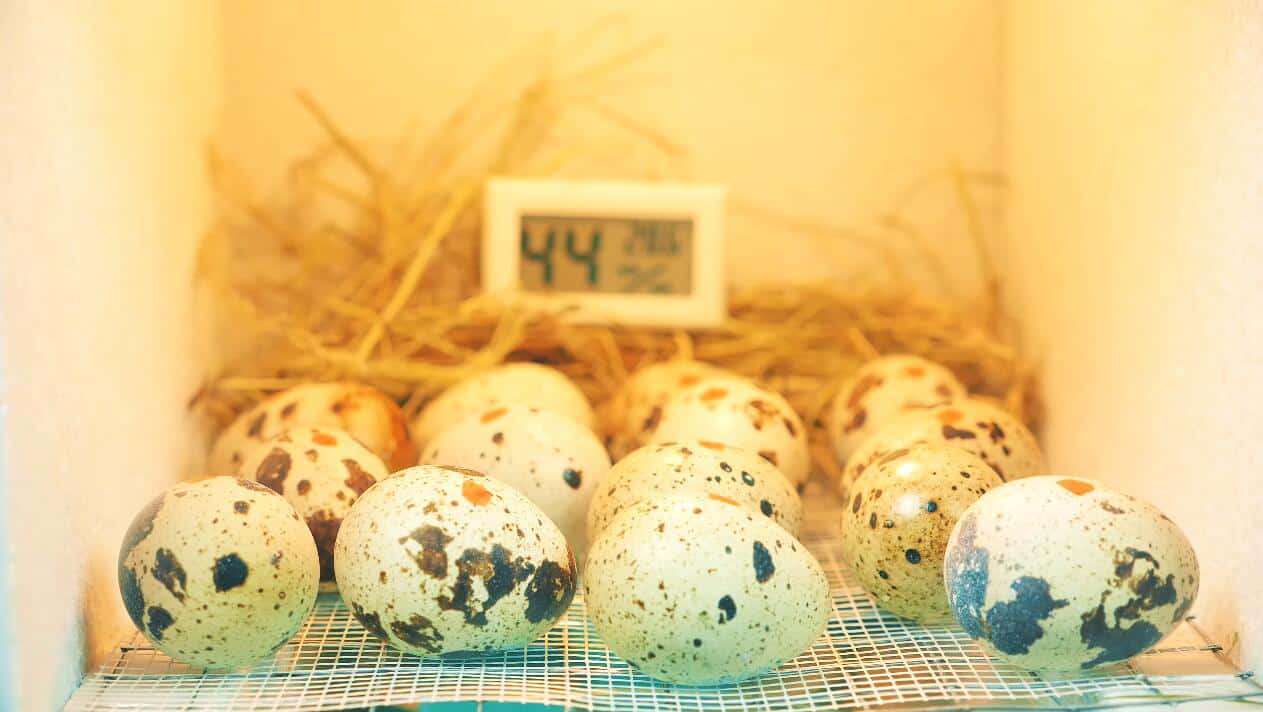
It is very easy to hatch quail eggs. Get yourself a high-quality commercial incubator with an automatic turner equipped with quail egg rails. Start the incubator going at least two days before your eggs arrive so you can be sure you have them adjusted to the proper, stable temperature (100 degrees) and humidity (44%).
Some people mess around with home-built incubators and hand-turning eggs, but these approaches never work as well as a commercial incubator. Plus, hand-turning quail eggs is tedious work.
Tip 2: Let Your Eggs Sit for a Few Hours
When your eggs arrive, most people are tempted to pop them into the incubator right away. We have found you get far better hatching rates if you carefully place the eggs, large end upwards, and let them sit quietly for a few hours at room temperature to recover from the jostling and temperature changes that occur during transport.
Tip 3: Clean and Disinfect Your Incubator
Hatching quail eggs demand a high standard of hygiene. Remember, your new hatchlings will emerge with underdeveloped immunity. They can easily succumb to bacterial and fungal attacks, leading to death and compromised chick health.
In our years of raising birds, we have also learned that dirty incubators can pass on their contamination to eggs, significantly reducing their hatching success rate.
Incubators are warm and humid, perfect conditions for bacteria and fungi to thrive. Other than sabotaging your hatching rates and compromising the health of your hatchlings, these pathogens promote odor build-up; nobody likes a stuffy hatchery.
Tip 4: Ventilate Your Incubator
Speaking of odor build-up, you should ensure that your incubator is properly ventilated. Commercial incubators usually have provisions for ventilation, but it’s your job to ensure that these pores aren’t obstructed by debris or dust.
So before your set up your incubator, ensure that the vents are clear. Our growing embryos need their fresh air. Oxygen is vital to the development of our growing embryos.
Proper ventilation also allows for carbon dioxide removal. The growing embryos use up oxygen and give up carbon dioxide, the circle of life. The accumulation of CO2 is detrimental to the growth and development of our future hatchlings. High carbon dioxide levels can lead to reduced hatchability, embryonic mortality, and poor chick quality.
We also need the vents for moisture control. Humidity is good at certain levels. But too much moisture could lead to diminished egg viability and create a heaven for the harmful bacteria and fungi we were trying to kill with our disinfectants.
Tip 5: Set a Reminder
With an automatic incubator, it is very easy to forget your quail are growing in there until you hear peeping. Suddenly, you realize they all hatched last night, and you haven’t set up the brooder yet; panic and haste should never be part of raising quail.
You’ll need to set a reminder for 15 days so you can put the incubator on hatch mode and get your brooder set up and stabilized. You’ll need to set another reminder for day 18 so you can watch them hatch out and then move them to the brooder.
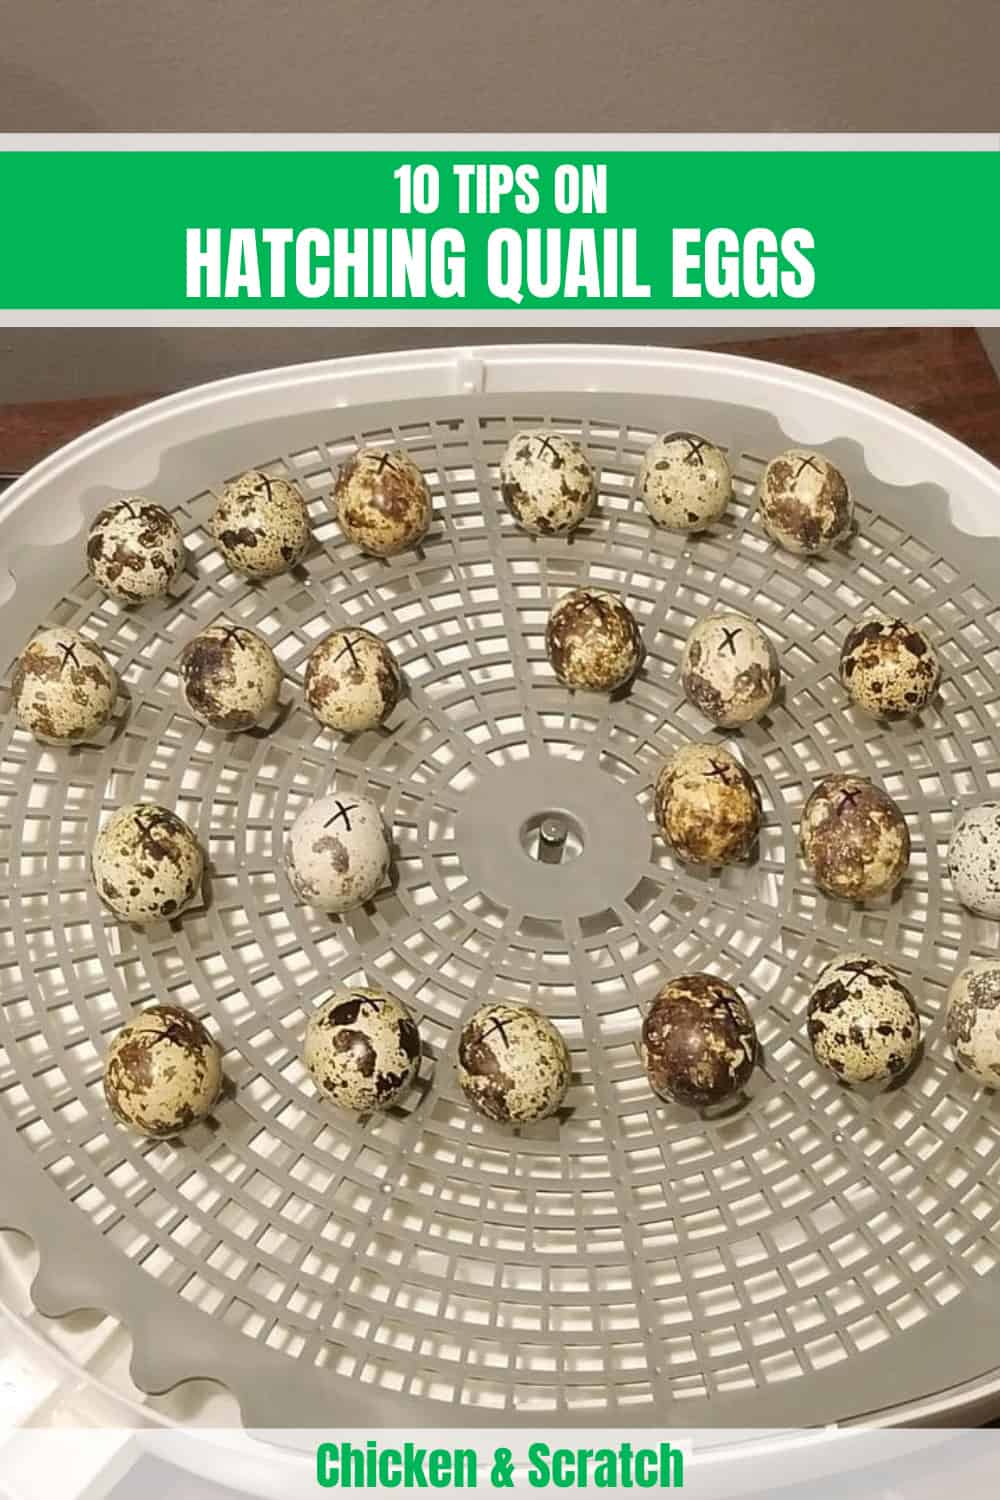
Tip 6: Buy Some Gravel Paper
One of the common reasons for culling quail chicks while raising quail is they slip shortly after hatching and dislocate a hip (splayed legs). We have reduced our incidence of splayed legs to zero by lining the brooder and the incubator during hatching with gravel paper.
Gravel paper is sold in many pet supply stores; if you can’t find any, head over to the hardware store and buy some coarse sandpaper. Some people use grippy shelf-liner instead and report it works almost as well as gravel paper in preventing splayed legs.
Tip 7: Don’t Bother With Candling
Although trying to candle quail eggs to see how they are doing is kind of fun, due to the coloration of the eggs, it can be quite difficult to see what is going on inside. Also, every time you open and close the incubator and take eggs out for candling, it disrupts the proper temperature and humidity in the incubator.
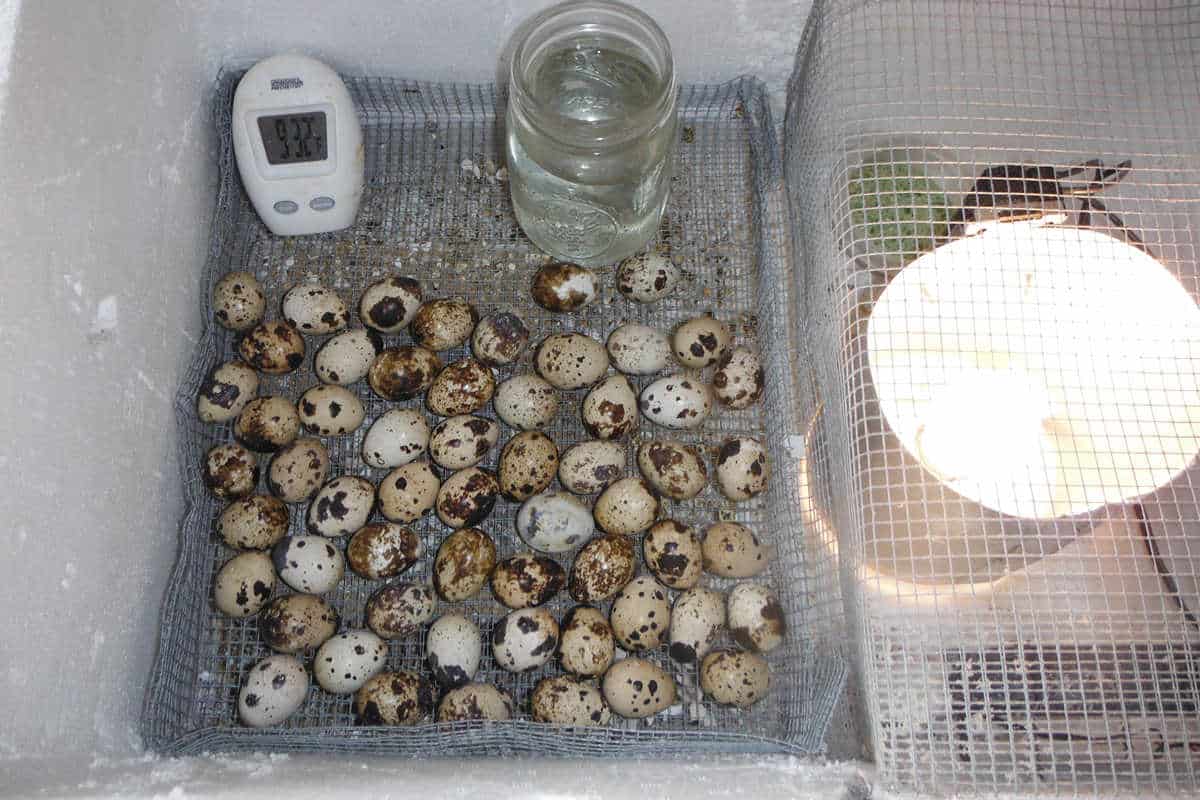
We recommend just checking the incubator once a day to see if it’s running properly and only opening it if you have to add some more water to maintain the proper humidity of 44%. If you really want to candle, do so on day 15 while locking down your incubator.
Tip 8: Take Your Time When Locking Down the Incubator
On day 15, you need to lock down the incubator for hatching and adjust its settings slightly. Take your time and do it slowly; as previously mentioned, haste plays no part in raising quail. First, adjust the humidity of the incubator up to 65%. Don’t just add a lot of water at once; add small amounts of warm water until you achieve the correct humidity.
Once it has stabilized, turn the temperature down to around 98 degrees. After everything is stable, carefully remove the eggs from the egg turner and remove the egg turner from the incubator. Line the incubator with gravel paper and place the eggs on their sides on the gravel paper.
Tip 9: Buy a Reptile Heating Pad
On day 15, after locking down your incubator, it’s time to set up the brooder. Newly hatched quail need a heat source in their brooder. While it is traditional to use a heat lamp while raising quail, we have found that placing some reptile heating pads set at 100 degrees in one corner of the brooder works very well for raising quail.
We put the pads in the brooder and then cover them and the bottom of the brooder with gravel paper. We use a heat lamp for the first week in another part of the brooder, so there are two warm spots for the chicks.
The reptile mat spot will be at 100 degrees, and we set the center of the heat lamp spot at 105 degrees, which creates a cone of decreasing temperature moving away from the hot center.
The rest of the brooder is unheated, so the chicks can freely move around to whatever temperature they need to feel comfortable. We remove the heat lamp after the first week of brooding and turn the heat mats off at around three weeks.
Tip 10: It is Okay to Give Assistance During Hatching
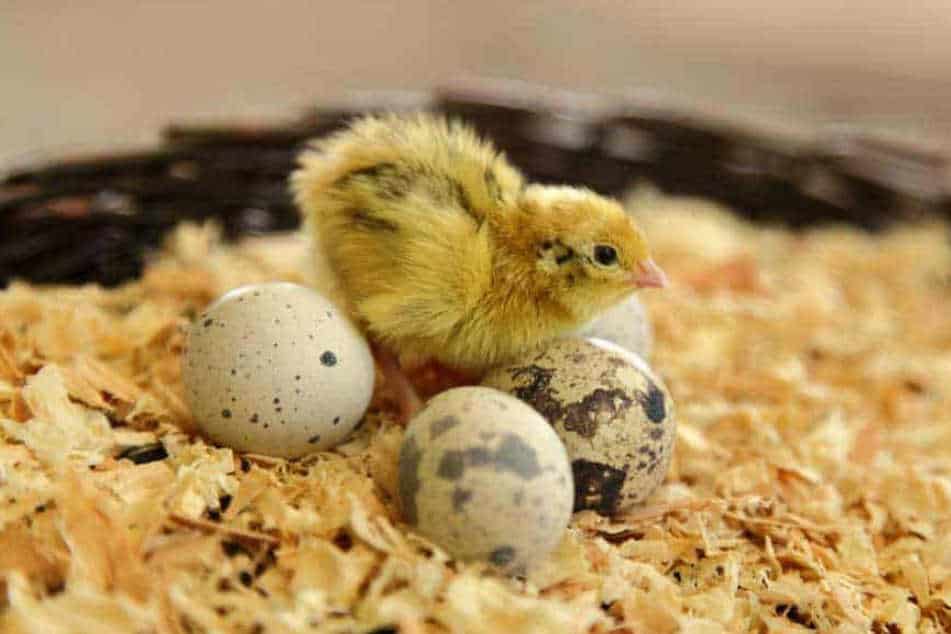
Most quail hatch very rapidly. They will make a cut around the top of the egg and then rest for a few minutes, then burst out and go running around. If you notice an egg has been cut or only partially cut, and the chick hasn’t popped out after a few hours, go in and rescue it.
Take a pair of tweezers and very carefully peel the shell and membranes off of the chick. Before we started assisting, we had a 10% survival rate of slow-hatching chicks; after assisting, we hit a 90% survival rate. Sometimes they get trapped in there.
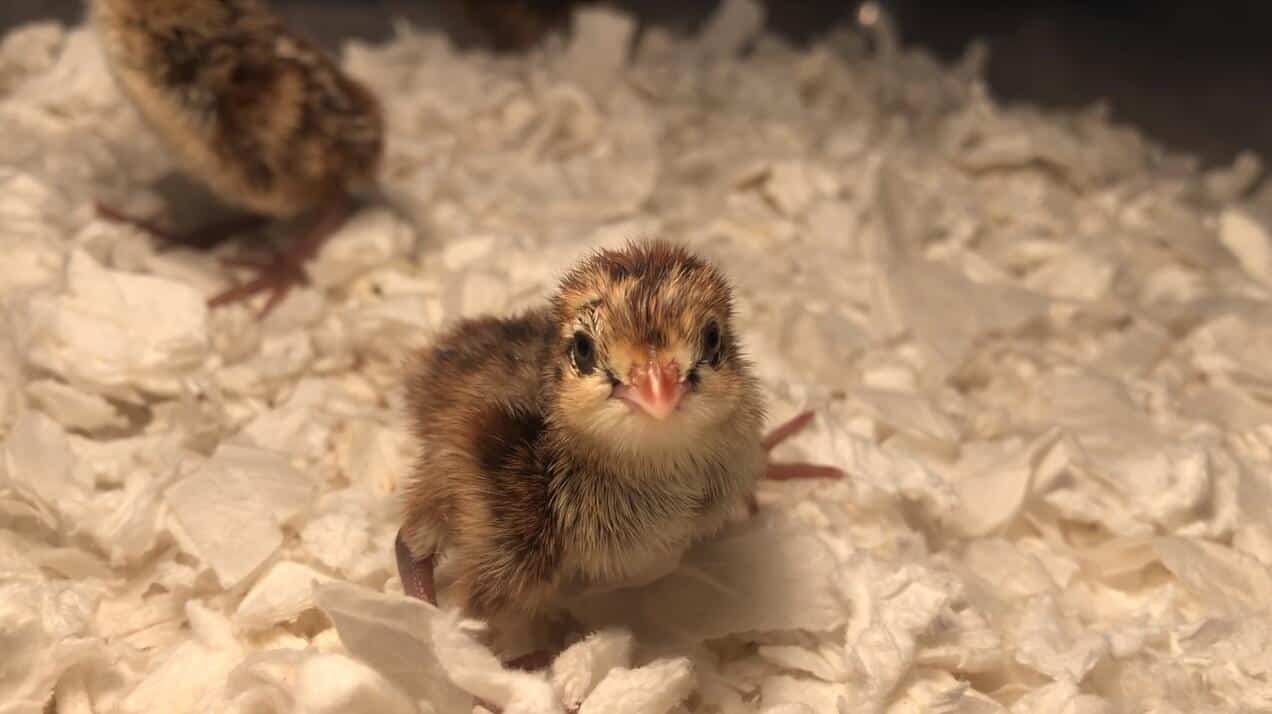
Tip 11: Remember, Baby Quail are Tiny
While setting up your brooder, remember that new-hatched quail chicks are incredibly tiny. If you have any openings or cracks in your brooder, they will somehow manage to find them and get out. If they go running around in your cold garage after escaping, they will quickly develop hypothermia and die.
Study your brooder construction carefully before raising quail in it. Some people have successfully raised quail with a brooder made out of a large cardboard box or a plastic storage bin.
It’s also important to remember that while new-hatched quail are incredibly tiny, they also grow at an incredible rate. What looked like a huge brooder on day one may end up being overcrowded by day 10 of brooding. Your brooder needs at least 6 square inches per chick, preferably more.
Tip 12: Get a Coffee Grinder
Baby quail need to eat high-protein game bird food, preferably around 28 to 30% protein. If you can’t find any locally for raising quail, you can order it. However, these foods usually come in what are called “crumbles” that are too large for baby quail to eat.
Buy a cheap coffee grinder and grind it up into a powder for the first two weeks of brooding. After that, the quail are large enough to eat the crumbles.
Summary
Raising quail is easy, and they make an economical poultry addition to any household to provide home-raised eggs and meat or to support a small business. Here are the important numbers to remember while raising quail:
- For days 1 to 15 of incubation, use 100 degrees F and 44% humidity while turning the eggs.
- For days 15 to 18 of incubation, use 98 degrees F and 65% humidity while not turning the eggs
- The eggs should hatch on day 18, but sometimes you’ll get one or two hatching on day 17 and a few hatching on day 19
- Provide a warm area of around 100 degrees F in the brooder for the first three weeks
- Feed the chicks a high-protein gamebird food
- By age four weeks, the chicks can be transferred to their adult quarters
- Hens will start laying eggs around eight to nine weeks of age and continue doing so until around age two or three years
- Roosters will reach butcher weight at 14 to 16 weeks of age

Joseph Hudson has been raising chickens for over 15 years. In 2018, he completed the Agriculture & Natural Resources program at Mt. San Antonio College. He currently raises over 1400 chickens on his 7.5-hectare farm. He keeps sharing his experience on raising healthy and happy chickens on Chicken Scratch The Foundry.


want to start razing quails
i have quial that are 6 mounth and have never layed a egg
They might need 1 of 2 things. Higher protein feed. Or more light. The like 14 hours a day to lay eggs.
Are you sure they’re hens ? Cocks don’t lay eggs.
my problem was too many roosters. I had checked them and thought i had them in trios but alas most of them were males. After i get the hens together down to 1 male they started laying within a week
Day 23 and no hatching yet, very disappointed, what did I do wrong
You can candle your eggs (shine a flashlight through the shell) to see if they were even fertilized in the first place if none hatched out, if they weren’t viable that could definitely be your problem
Do we remove the hatched quail out of the incubator immediately after hatching?
If all the eggs hatch, then you could.
But if you open up the incubator, some folks feel the unhatched eggs dry out and reduce the hatch of the rest of the chicks.
No.
Leave them in the incubator for 6 to 8 hours until all their feathers are Completely Dry. Do not open or move them until then.
After they are dry move them to your pre heated broader and keep them well.supplied with food and good clean water
we are thinking about raising bobwhite quail, do you have any tips.
I’m so glad found your site. I have 24 Quail eggs in the incubator, today was lockdown day till hatch. I needed to know the humidity to keep them I found it here. Looking forward to Quail motherhood. Thanks, Laura M
All my baby quail are dying. They stayed in the incubator 3 days and they can’t walk and ate dying. What did I do wrong?
Well idk you take 3 days without eating or drinking water and see what happens 🤔
They dont have the three day yolk reserve a chicken does
Left them in there to long. Max 48hrs in incubator after hatching then move to brooder. Don’t feed or water them in the incubator
3 days is too long in the incubator affter hatching. I take mine out as soon as they are dry at around 12 hours. Your chicks are likely to be dehydrated and starving. They can survive in the incubator for up to 48 hours, but I’m of the persuasion that the sooner you get them eating and drinking the better.
Great post. Thank you! If I am incubating my eggs from coturnix quail can they be refrigerated until I have enough to fill the incubator?
No leave them at room temperature
Actually, there is a study that shows that quail eggs can be kept in the refrigerator (7.5C 5% humidity) and remain viable. At a surprisingly high hatch rate, even after 20 days. You do need to let them come back to room temperature for a couple house before you put them in a warm incubator, though, or the temperature stress can kill them.
Here’s the link for the curious. http://www.lrrd.org/lrrd20/10/vasc20164.htm
Hi im on day 13 and my incubator has packed up can i save them any way many thanjs
wow wonderful lecture thank you so much.im looking foward to incubate quail eggs
I have 12 quail eggs, been in incubator now 18 days. I very carefully took some outer shell away , not disturbing membrane, to have a look to see if there was anything inside. I can see feather shape, but nothing moving. Have placed back in incubator for a few more days. If nothing happens I know it didn’t make it. Any ideas of what caused my babies to die inside? After another few days I will fully open to have a better look.
Hi Amanda,
I’m sorry to hear about your quail eggs. The cause for unsuccessful hatching could be incorrect temperature or humidity, insufficient turning of eggs, poor nutrition of parent birds, or even genetic issues. In the future, try candling the eggs around day 7 to check for development. If the eggs don’t hatch in a few more days, remove them to avoid contamination. Don’t get discouraged, hatching eggs can be a bit of a trial and error process. Better luck next time!
Hi thanks for info. After another day I broke open all the eggs. There was nothing inside. I thought I saw feathers but obviously only the think yolk. Well I was so unlucky none where fertilised. I am going to try again.
So are the california valley quail no good for eating at all? I know they may not be optimal breed if wanting meat, but can they be eaten?
Hi Kat,
Yes, you can eat California Valley Quail. While they are smaller than other breeds often used for meat, they can still provide a decent amount of meat. However, for meat production, larger breeds like the Coturnix may be more efficient.
trying for the first time vary helpful thank you all