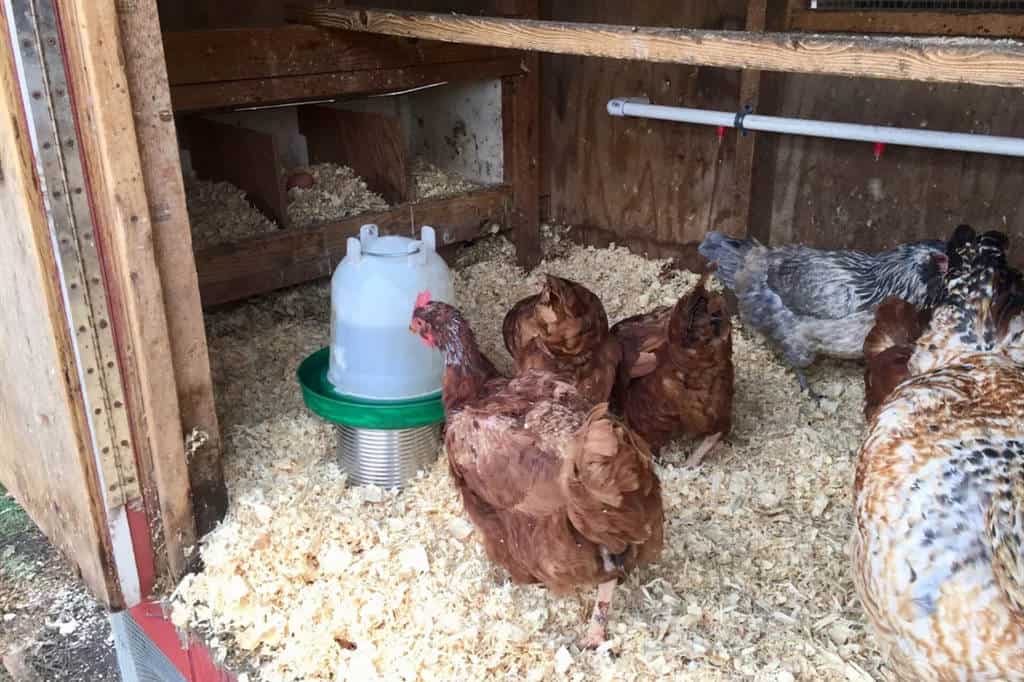
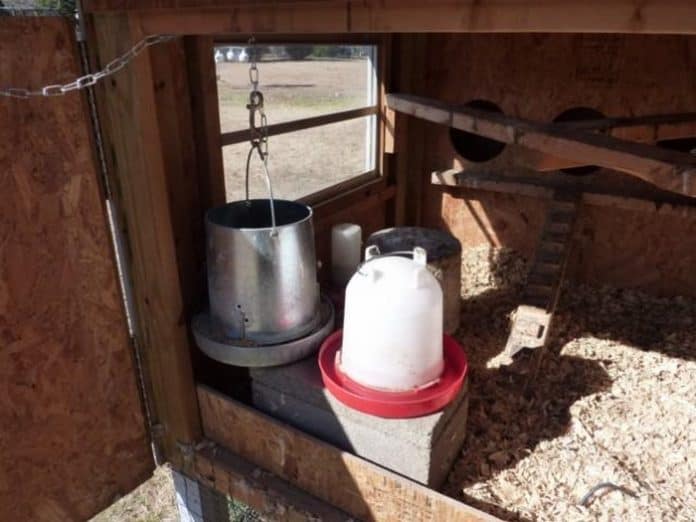
If you live somewhere cold, chances are, you’ve had problems with your animals’ water freezing over. When the temperature drops below freezing, you need something heated to ensure all of your livestock can stay hydrated and drink whenever they want.
Since buying these systems can be expensive, we’re going to give you a quick overview of 23 DIY heated chicken waterer plans that you can try to ensure your chickens have fresh water whenever they want it below.
1. Easy DIY Heated Chicken Waterer
Oh, you’re gonna love this easy project! Just grab a cement cinder block, heat cable, tile, electrical tape, and your trusty tools. The best part? When you’re done, just place your waterer on the cinderblock and let the heat cable work its magic! No more cold spots – the entire waterer stays ice-free all winter. Your chickens will be clucking with delight, and it’ll take less than an hour to finish.
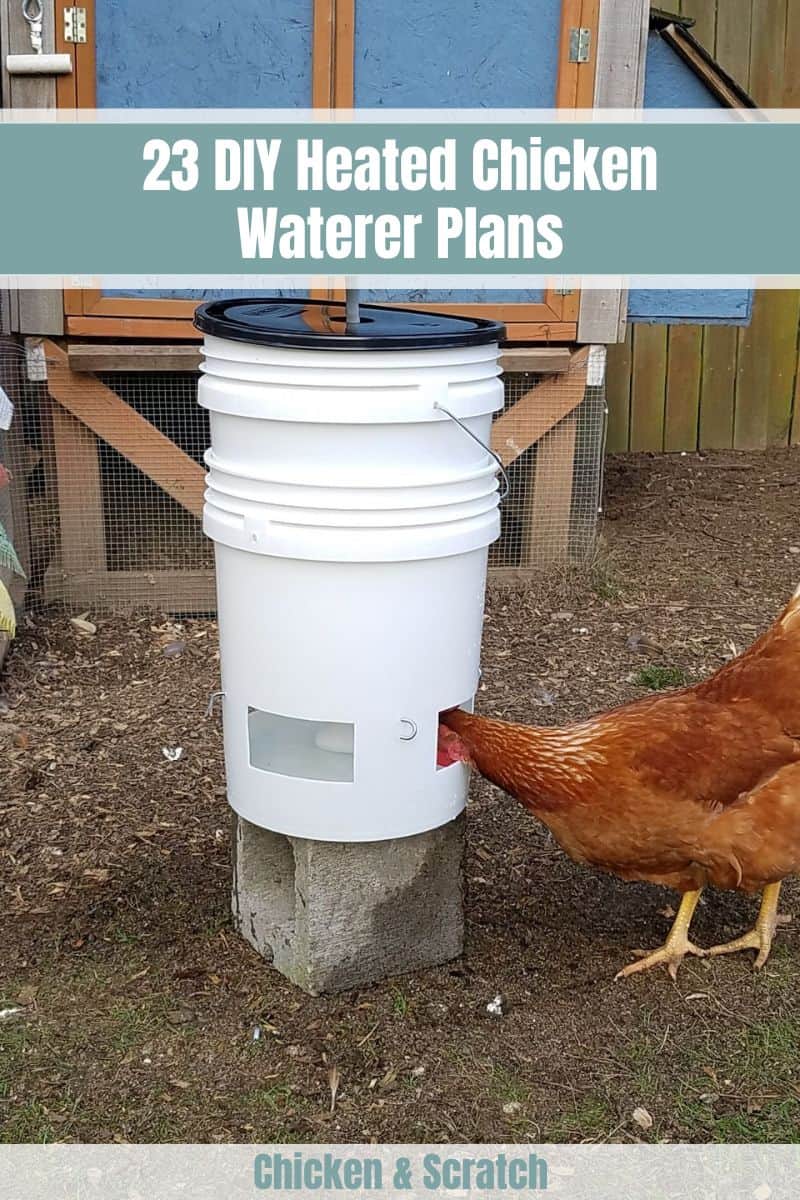
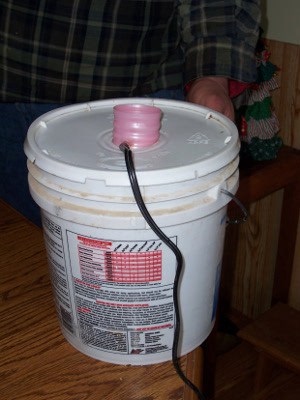
2. 5-Gallon Heated Waterer
Flip your 5-gallon bucket upside down and drill holes equally spaced around the base for the four nipples. Next, flip the bucket upright, get your bucket heater, and secure it into the middle of the bucket’s bottom. Cut a notch in the lid for the cord, secure the lid, position it out in the chicken yard, fill it, and hook it up to a power source.
3. How to Make a DIY Heated Chicken Waterer
Drill two to four holes in the base of the bucket and put the nipples in so your chickens can drink. Drill a hole in the top, just under where the lid ends, to run your aquarium bubbler and heater. Slip the cords through the holes and suction the heater and bubbler to the bottom of the bucket. Secure the lid, plug it in, and put it with the chickens.
4. Easy DIY Heated Chicken Waterer
Pick out a two or five-gallon bucket with a painter lid. Drill holes at the base and install the nipples so the chickens can get water. Buy a bucket heater and secure it to the interior bottom of the bucket. Drill a hole in the side by the top and run the cord through. Fill it with water and attach a chain to hang it in the coop.
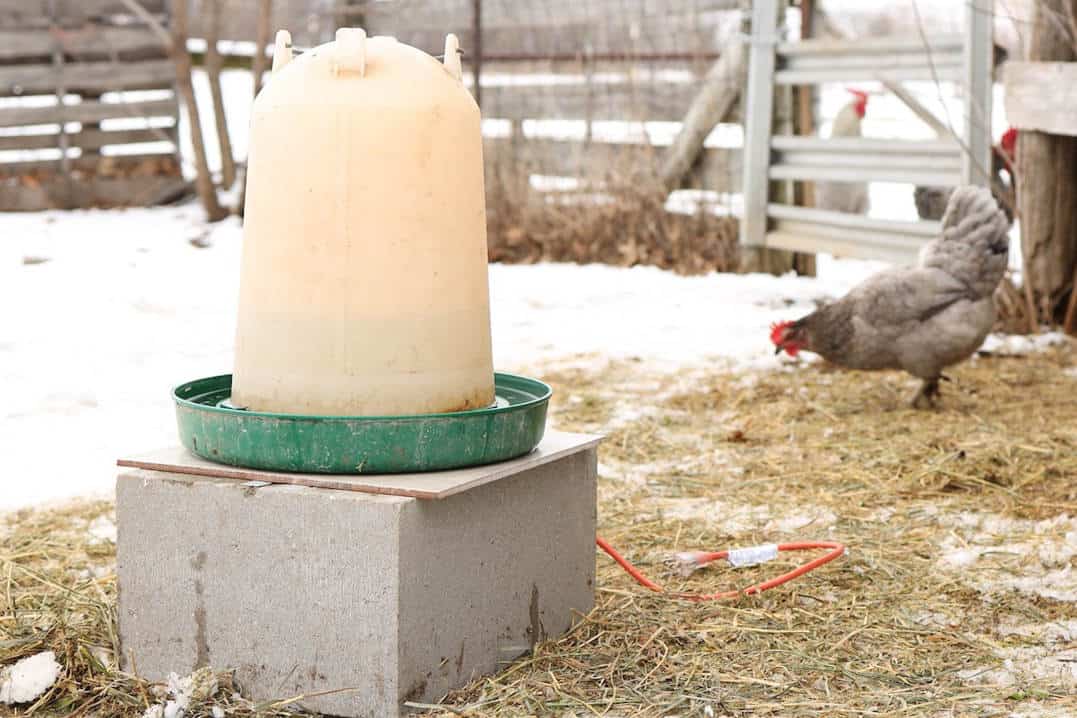
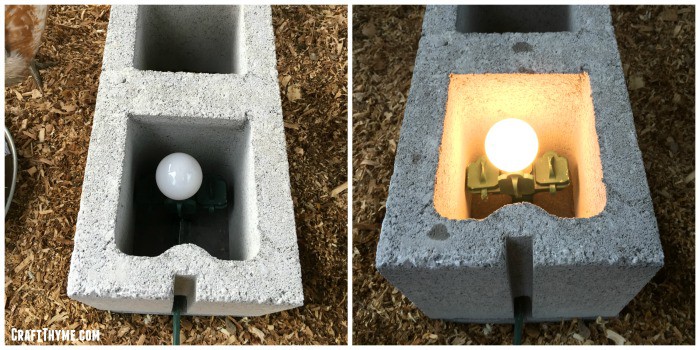
5. Chicken Water Heater
Get a concrete half block and chip a hole for your cord to run out. Screw the lightbulb into the socket converter and plug it into your extension cord. Set the lightbulb into the half a cinderblock, running the cord out the side. Next, put your large piece of tile in the coop, and set the cinderblock on top of it. Set the waterer above the light and turn it on.
6. Best Heated Chicken Waterer
Get an old tire, a block of Styrofoam, knife, and a chicken watering pan. Lay the tire on its side and stick the Styrofoam block into the open space. Cut the Styrofoam so it fits snugly into the tire and your water bowl fits inside it. Put your tire out in a sunny spot in your chicken cook and fill the bowl with water.
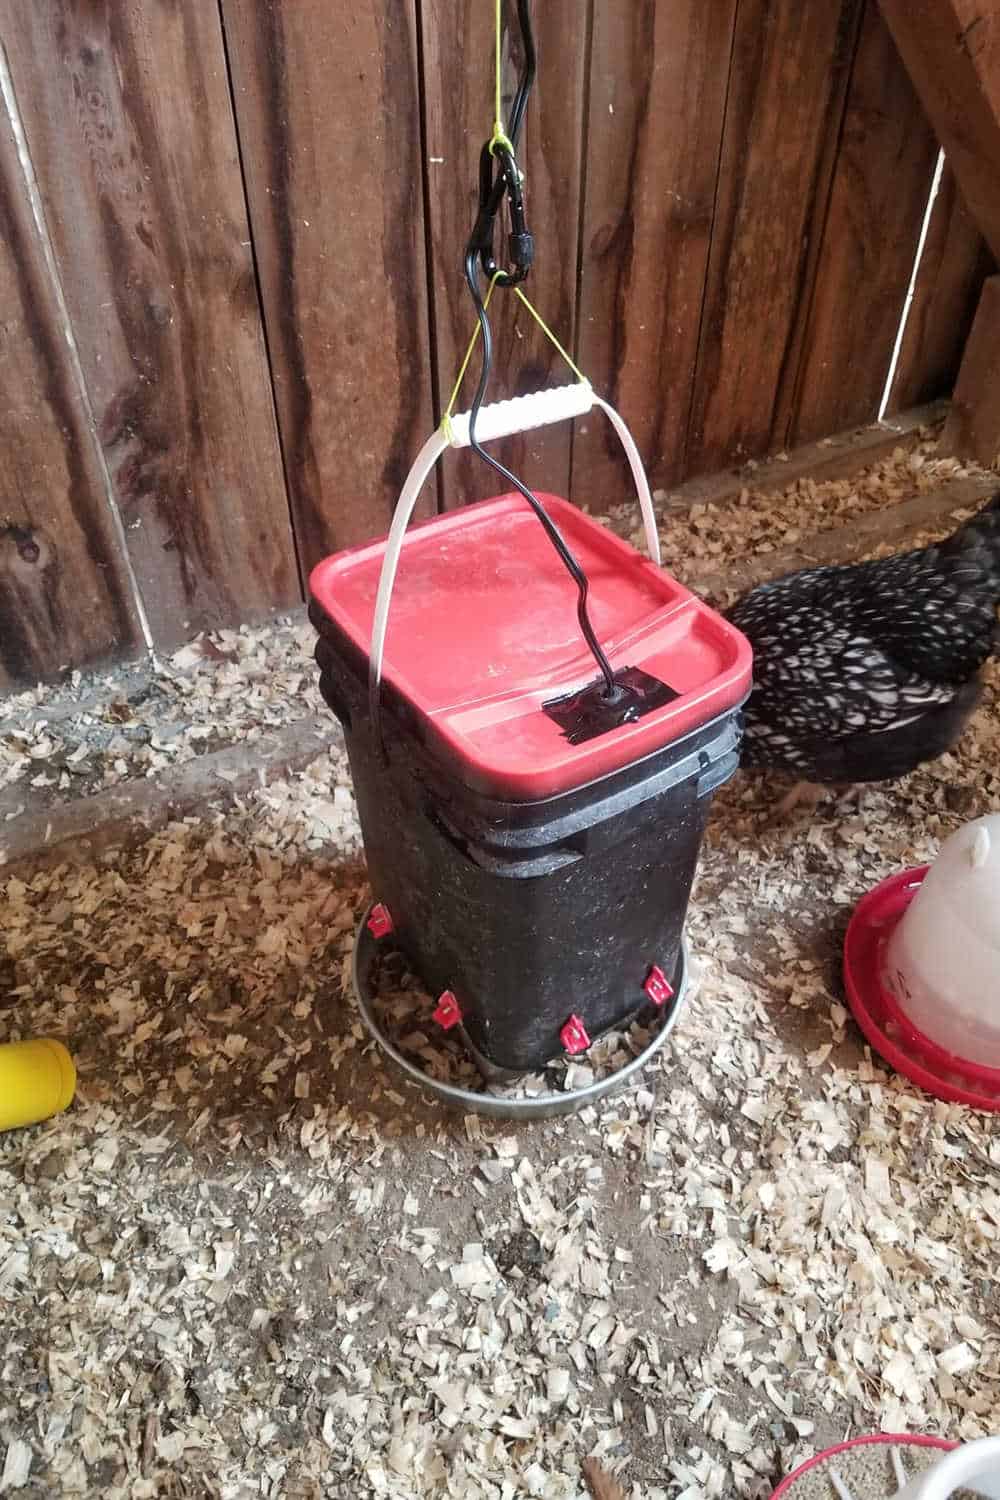
7. Heated Hanging Bucket Waterer
Drill two holes in the bottom of a 5-gallon bucket and install two water nipples. Install then, flip the bucket upright, and install the aquarium heater, suctioning it to the bottom of the bucket’s interior. Cut a two-inch hole in the top of the lid to fill it and clean it. Run the cord through the hole, and plug it with Styrofoam. Hang the bucket after you fill it.
8. Heated Waterer Without Electricity
Buy a small solar aerator and attach it to the top of the coop. Drill a bike hook into the side of the coop to hang the bucket, a few feet off the ground. Cut a hole in the bucket lid for the aerator cord and in the base for the nipples. Attach the aerator to the bottom of the bucket, install the nipples, and run the cord out before filling.
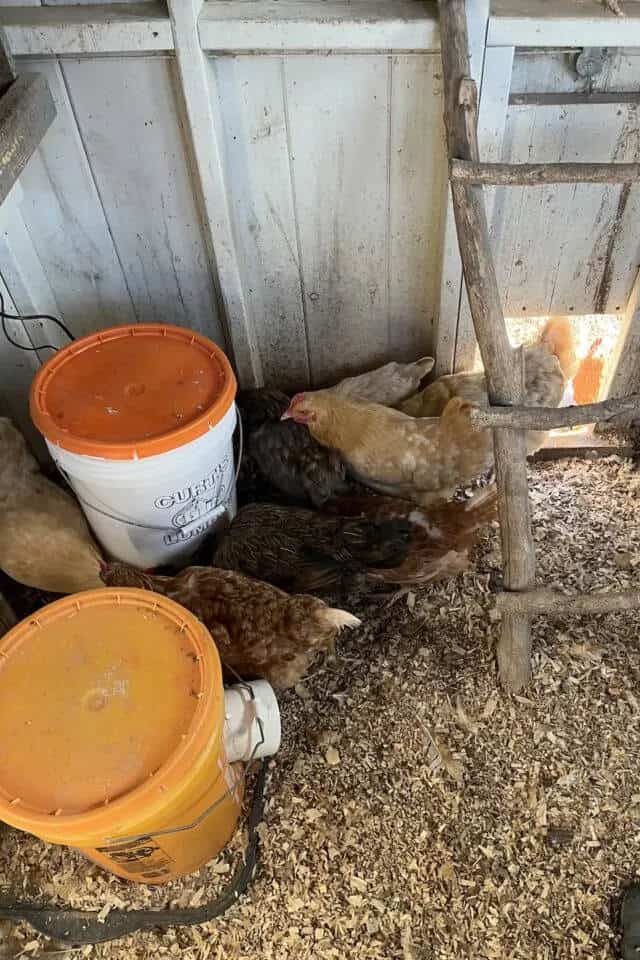
9. Homemade Heated Chicken Waterer
Get two 5-gallon buckets and cut the bottom out of one, set it aside. Drill two holes and insert water nipples into the bottom of the unmodified bucket. Wrap 2-3 coils of heat cord around the bottom of the unmodified bucket and tape it in place. Slide this bucket into the bottomless bucket until the bottomless bucket hangs over by 2-3 inches. Fill with water and hang it.
10. Worry Free Heated Waterer
Get a cinderblock and set it on the side, holes up. Coil heat cord inside each hole, taping it in place. Chisel enough block away to run the heat tape into each hole and out the side. Set a 12×16 piece of tile over the opening and put the cinderblock in place in the coop. Plug in the heat cord to an extension cord and set the water on top.
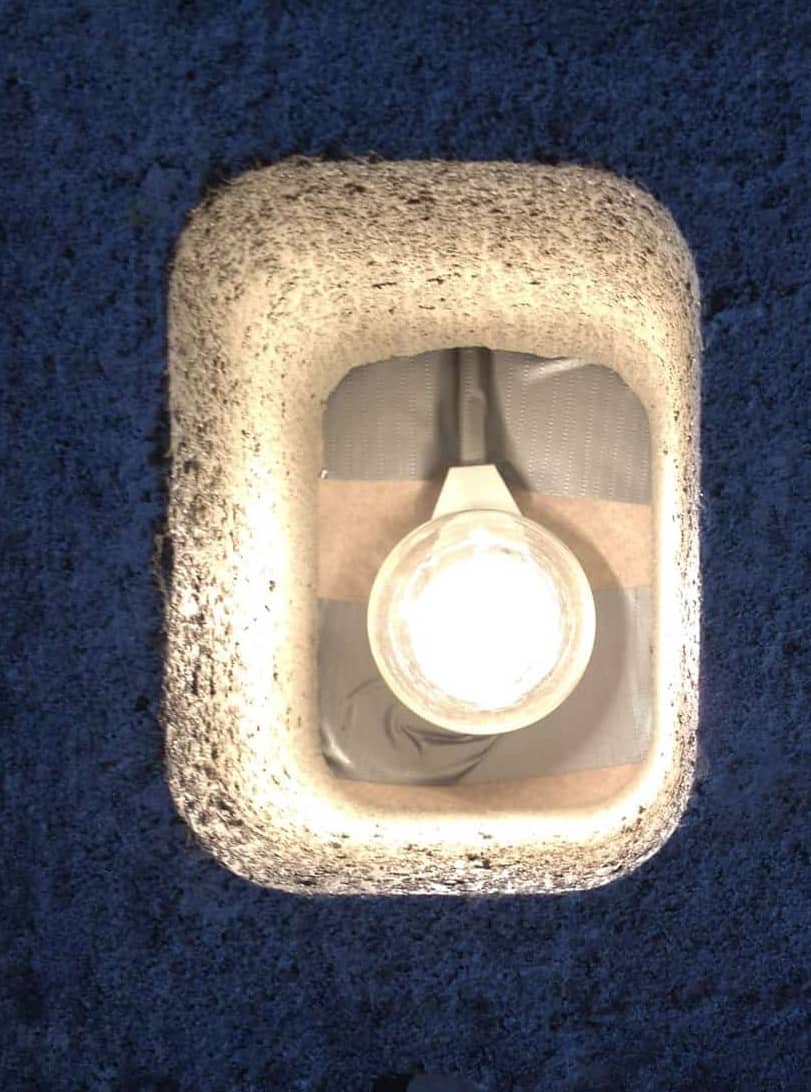
11. DIY Chicken Water Heater
Buy a metal chicken water, tall cinderblock, extension cord, tape, pluggable light sock, 40-watt bulb, and a concrete paver. Set the cinderblock up on end, chisel a spot for the extension cord to come out. Plug the socket into the extension cord, screw the lightbulb in, and set it inside the cinderblock. Set the cinderblock on the paver, set the waterer on top, and plug in the extension cord.
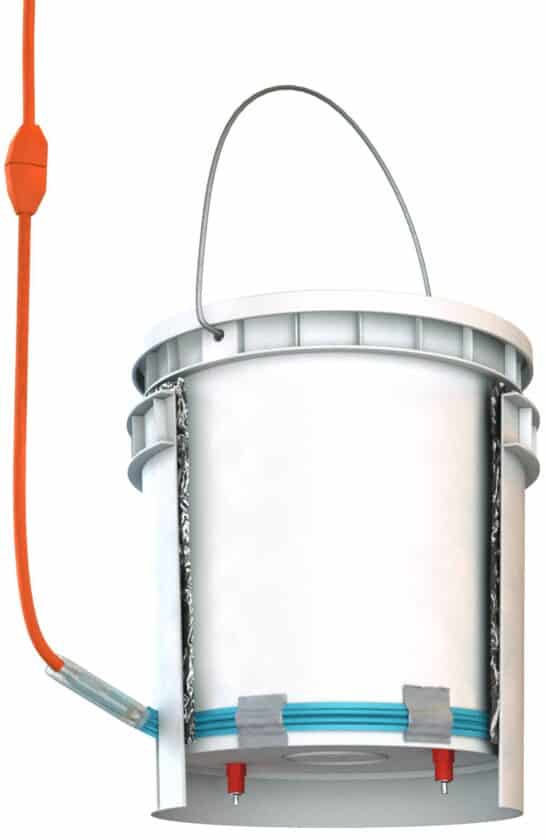
12. Ice-Free Chicken Nipple Waterer
Get a 5-gallon bucket lid and a 2-4 gallon bucket. Drill 2 to 3 holes a few inches from the base and install the water nipples. Wrap a few coils of heat cord with an attached thermostat around the bottom of the bucket and cover it with tape. Plug the heat cord into an extension cord, set your preferred temperature, fill the bucket, and set the 5-gallon bucket’s lid on top.
13. DIY $5 Heated Chicken Waterer
Find a #10 tin can and cut open one end. Trace around the can and cut a wooden base using a jigsaw, leaving 1/8-inch of room outside your line. Cut a hole for the extension cord in the base. Wire your light bulb fixture, screw in the 40-watt bulb, put it in the base, and set the can over it. Set your waterer on top of the can and plug it in.
14. 55-Gallon Heated Chicken and Duck Waterer
Buy or find a 55-gallon plastic barrel with a lid and set it up on a cinderblock. Drill holes around the base and insert the water nipples. Fill the barrel and secure the lid. Next, get a submersible heater and run it through the small pre-punched hole in the lid. Switch it on to heat the water. Put a cone of chicken wire over the top of the barrel.
15. DIY Heated Waterer
Get a square 4-gallon bucket, drill eight holes, and insert two water nipples on each side. Drill or cut a 2-inch hole in the top of the bucket and attach the aquarium heater in the bottom by taping it in place. Run the cord up through the hole and plug it into your extension cord. Fill the bucket with water and set it on a brick, or suspend it.
16. Winter Chicken Watering System
Buy a 2-gallon cooler and drill a hole in the side large enough for 2-inch PVC pipe. Attach the PVC, drill holes for the water nipples, and create the structure to run out of the coop. Suction the aquarium heater to the bottom of the cooler and cut a notch for the cord to run out. Create a base using wood blocks, fill, and set the thermometer’s temperature.
17. Inexpensive Heated Chicken Waterer
Buy a concrete stepping stone, cinderblock, lightbulb and socket, cord, screws, bolts, and an aluminum bracket. Drill a hole in the block for the cord. Wire the socket and insert it into the cinderblock. Screw in the lightbulb, attach it to a power source, and test it. When you get it working, move your cinderblock to its new location, set down the paver, put the cinderblock on top, and top with the waterer.
18. DIY Bucket Heated Chicken Waterer
Buy a 5-gallon bucket and water nipples. Drill holes at the base and install the nipples. Buy a plastic-safe 250-watt bucket heater. Drill a hole by the top and thread the heater’s cord through. Go back and silicone the slit you made to make it watertight, leaving the hole with the cord. Fill it, secure the lid, and suspend it in the coop a few feet off the ground.
19. Simple Chicken Heated Waterer
Buy 2 cinder blocks, extension cord, 30-watt bulb, 6-gallon bucket with lid, drill with bit, and a bulb adapter. Set your block where you want your water. Drill a hole in the cinder block and run your extension cord inside. Plug in your bulb adapter and screw in the bulb. Flip it on. Set your waterer over the bulb on the cinder block and allow it to heat up.
20. Circulating Water Heater for Chickens
Get a 30 gallon bucket, 3/4-inch hose, adapter, pump, 6-8 feet of 2-inch PVC pipe, water nipples, and a brass hose bib. Drill holes and install the nipples in the PVC pipe, attach it to the hose, and run the hose into the bucket. Attach the pump inside the bucket, fill it, and switch it on to circulate the water to keep it from freezing.
21. Quick DIY Heated Chicken Waterer
Buy 5-10 water nipples, an aquarium heater, 5-gallon bucket, extension cord, and a drill with a bit. Drill holes and install the water nipples in the bottom of the bucket. Suction the heater in the bottom and drill a hole by the top to thread the cord through. Drill a hole in the lid to fill it and secure the lid. Suspend the bucket, fill it, and turn the heater on.
22. DIY Heater for Chicken Waterer
Get a shallow, round metal cookie tin and drill a hole in the side. Thread a 12-gauge SO cord through the hole and wire it to the lamp assembly kit. Screw the 40-watt bulb into the socket, and turn it on. Put the lid tightly in place and put the whole setup on flat ground or a piece of tile. Set your chicken waterer on top.
23. Hanging Heated Chicken Waterer
Buy a 5-gallon bucket and water nipples. Drill holes 2-3 inches apart in the base and install the nipples. Add a small amount of Teflon tape to the nipples to prevent leaks. Not the lid with a utility lid to run the de-icer cord through. Put the deicer in the bucket, flush to the bottom. Secure the lid, fill it with water, and hang it on a bicycle hook.
Conclusion
We’ve listed 23 DIY heated chicken waterer plans that you can use to keep your chicken’s water open, even in the coldest temperatures. We ensured they’re all DIY-friendly, relatively inexpensive, and easy to do in a few hours at most. We encourage you to go through and find the one that works best for your needs to keep your chickens hydrated and happy, no matter the weather.

Joseph Hudson has been raising chickens for over 15 years. In 2018, he completed the Agriculture & Natural Resources program at Mt. San Antonio College. He currently raises over 1400 chickens on his 7.5-hectare farm. He keeps sharing his experience on raising healthy and happy chickens on Chicken Scratch The Foundry.